HOWTO: Windows full disk encryption with TrueCrypt 5.0
UPDATE: If you're here for TrueCrypt installation details, check out our How-To for TrueCrypt 6.0a.
As promised, I've begun to test TrueCrypt's full disk encryption capability. For personal, one-off full disk encryption, and particularly for free, it appears to be a compelling product. It doesn't have any of the enterprise features that you will find in many of the current commercial products - there is no provision for key escrow, central reporting, or other features suited to enterprise use, but the software itself has a clean interface and is reasonably straightforward.
In my testing thus far, I've run into one crucial problem - I can't get a clean ISO burn of the restore disk. With no method to skip the process, and no work-around to simply check the rescue disk image against what it expects, there is no way to move past the CD/DVD check screen without some trickery.
I've tried on multiple machines, burned the image using three different ISO recording packages - all of which work for other ISO files, and TrueCrypt refuses to recognize the burn. The good news is that you can fool it for testing purposes - grab the free Microsoft virtual CD mounting program here.
You'll need to install and start the driver included in the package first, then you can mount the ISO. This doesn't do you any good for actual rescue - but it will let you successfully test the full volume encryption.
If you are taking TrueCrypt's full disk encryption for a test drive, make sure you do it on a test machine first! This is entirely at your own risk.
1. Download TrueCrypt and install it.
2. Start TrueCrypt, and select System, then Encrypt System Partition/Drive.

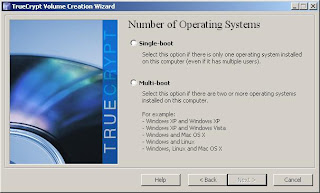
3. Select Encrypt System Partition/Drive. TrueCrypt spend a moment or two detecting hidden sectors, and will then display a menu asking for the number of operating systems. In this example, there is only one operating system, so we will select Single-boot, then click Next.
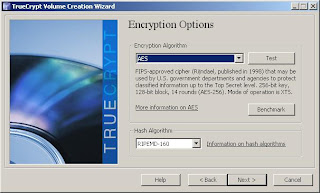
4. Select your encryption options. I'll select AES as a reasonable choice - there are a number of schemes, including multi-algorithm options if you're particularly paranoid or have special encryption requirements. Note that RIPEMD-160 is the only supported hash algorithm for system volume encryption.
5. You will be asked to create a password - passwords over 20 characters are suggested by TrueCrypt. It will then use mouse movements to generate a random seed to feed into the encryption algorithm. Click Next again on the next screen unless you want to re-generate your keys.
6. Now you will have to create a rescue disk. This acts as a rescue disk for damaged boot loaders, master keys, or other critical data, and will also allow permanent decryption in the case of Windows OS problems. It also contains the contents of the disk's first cylinder where your bootloader usually resides. Provide a filename and location for the rescue disk.
7. TrueCrypt will now ask you to burn the rescue disk image to CD/DVD. You cannot proceed without allowing TrueCrypt to verify that this has been done.
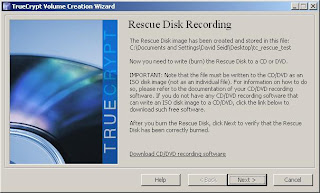
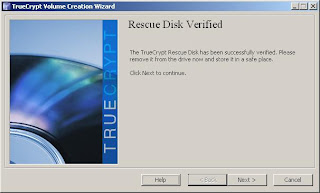
8. If you make it this far - and as I mentioned earlier, some burning software appears to not be TrueCrypt ISO friendly, then you're ready to go on with the encryption process. First, you will receive confirmation that your rescue CD is valid.
9. Now you need to choose your wipe mode - this is how your deleted data will be wiped from the disk. Select the mode that you're most comfortable with - for my own use, I'll select 3 pass wiping as a reasonable option.
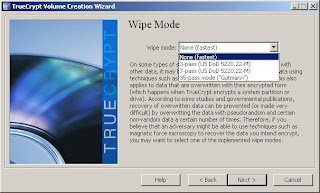
10. TrueCrypt will now perform a System Encryption Pretest - it will install the bootloader and require your password to get into the OS.
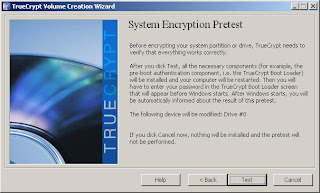 11. Once you've rebooted and successfully entered your password, you will receive a success message. TrueCrypt will then ask you to print the documentation for your rescue disk for future reference. Click ok, and you will move on to the encryption process.
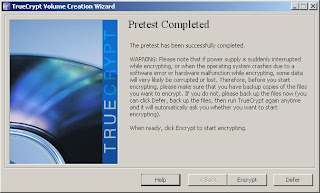
12. Your time to completion will depend on usage of the system, the size and speed of the disk, and a few other factors such as the wipe mode you selected. In my small scale test, a 4 GB test VM partition encrypted in about 15 minutes. I would expect non-virtual machines to see a performance boost over that, and machine that aren't seeing active use should move along at a nice clip.
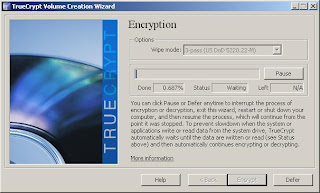 What does it look like when you're done? Well, on boot, you'll see a DOS style prompt for your password, after which everything else acts just like your normal machine.
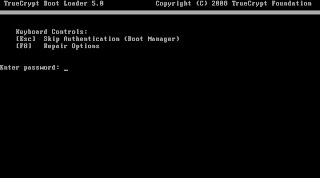
What's next? I'd like to find out if others are having similar issues with TrueCrypt's ISO creation process, and I'm interested in seeing performance differences between this and commercial products - hopefully someone with a nice test lab will benchmark them. MacOS support for encrypted volumes would be a great addition, and is one that I hope that the MacOS TrueCrypt port team tackles in the near future - I haven't found a vendor providing OS X full disk encryption yet, and that's definitely something the market needs.
6 comments:
Just popped past to say I'd really love to see speed comparisons, I'm just using TrueCrypt in enclosure mode but it's annoyingly slow. I'm seeing ~40MB/s and very low CPU usage from a drive that's capable of 90MB/s or more. So i'm trying to find out whether there's anything faster on the market.
I have just attempted to use Nero Express 6 to burn the Rescue Disk ISO to a blank CD. It gives the CD the correct name, but the resulting disc does not contain any files. I have got myself a coaster here too.
I burnt the ISO onto a DVD using Nero Express, it didn't recognize the disc immediately after the burn though -- you have to eject it and reinsert it. If you try to browse the contents of the disc (using windows explorer in my case) it will appear empty though it has the label 'TrueCrypt Rescue Disk'. Overall, everything seems to be working fine.
Hi Rizzy, Interesting how my problem has the same symptoms as you describe. However, I burned the ISO to CD on a separate machine to the one I was installing TrueCrypt on, and it failed the compulsory Rescue Disk test.
This TrueCrypt "let's prevent stupid users from shooting themselves in the foot" requirement that people create a restore disk is incredibly asinine and patronizing. Let's keep in mind that many people install disk encryption simply because they're fed up with being treated like kids, spied on, or otherwise harassed. It seems totally whack to assume that these people would be willing to learn the various technicalities of disk encryption but not burn an ISO file if they needed to recover the system.
Maybe their lawyers told them to do this. It's still pretty damn irritating.
Regarding all the Rescue ISO Image Problems I've finally found the reason. Apparently some CD recording software strips the El Torito (check out Wikipedia for the specs) bootimage from the ISO image.
That bootimage contains your crucial data and is not visible when you browse the content of the rescue disk so a valid and invalid rescue CD will look the same.
In my case the Software that came with the Notebook (some Roxio crap/shovel ware) stripped the TrueCrypt boot loader from the ISO image before burning it to CD. No comments, no warnings, nothing. Even when you switch on "verification" it claims to have written everything just nice.
I copied the ISO image over to a Linux box and burned it with k3b and it works perfectly.
If you suspect that your recording software does the same, try to read back an image the burned CD. If that image is only about 500-600kb than you recording software is crap. It should be about 1.8mb. Ideally it should be exactly the same size as the one that you started with.
Post a Comment